Hallways are often a forgotten space and commonly become a dumping ground for shoes, coats, bags and everything in between. Easily overlooked as a room itself, hallways often get put at the bottom of the DIY to-do list. However, what many people forget is that a hallway is often the first room people see when they enter your home and can therefore leave a lasting impression. This is also the case for upstair hallways alike, connecting bedrooms and bathrooms, it’s important that this space feels like a network between rooms and allows for the homeowner’s style to flow naturally between.
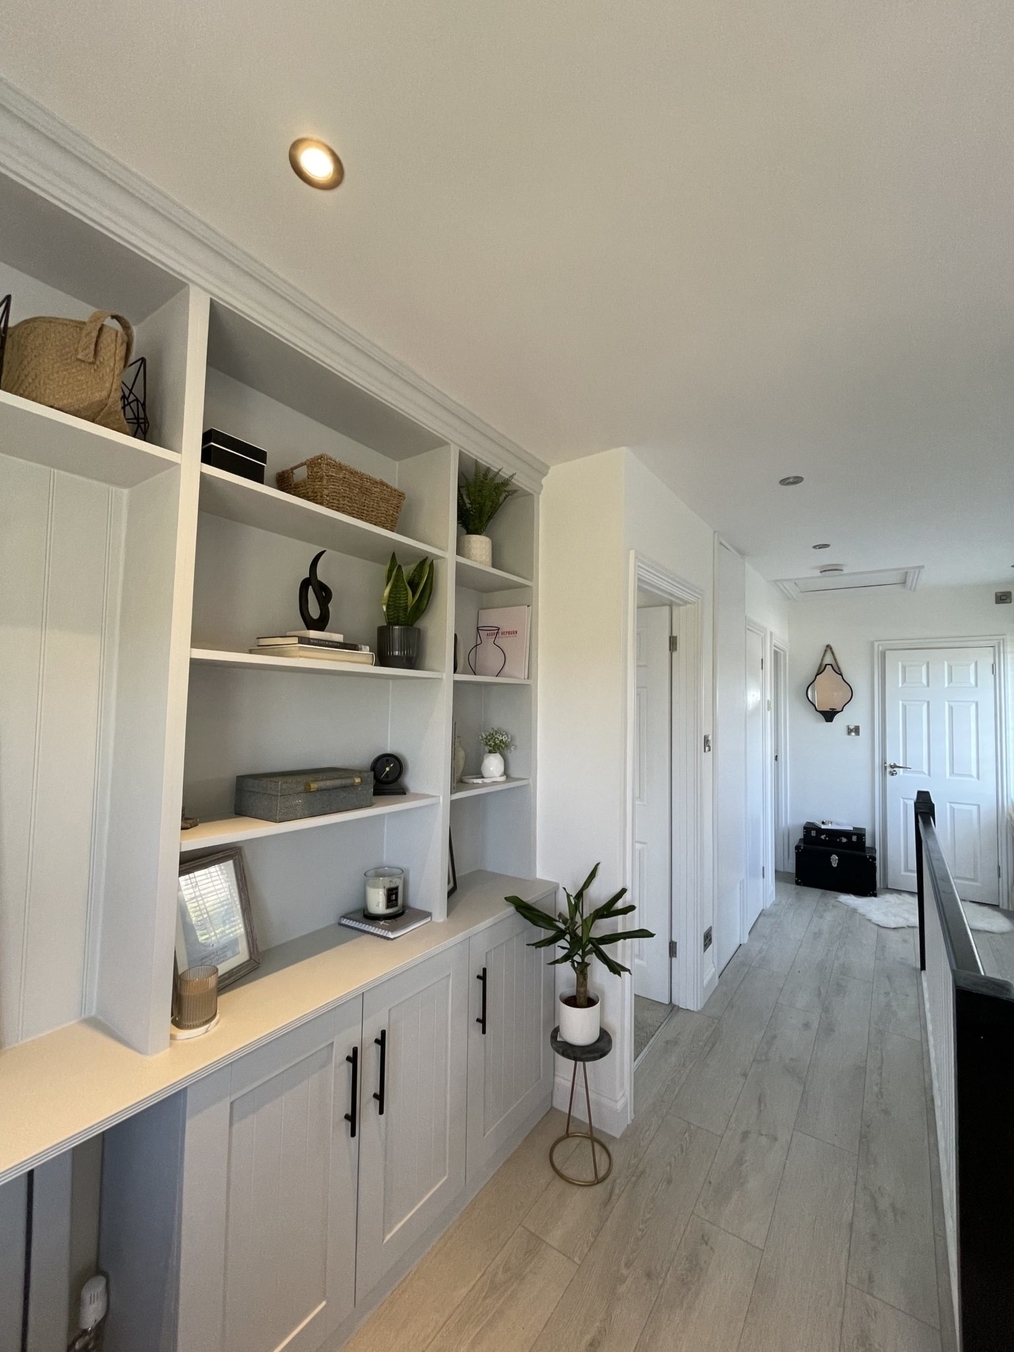
As you will know by now, here at Jacobs & Dalton we love to see an exciting room transformation and we just had to talk to Charlotte about her hallway makeover when we came across her Instagram @charlottes_homestyle. Charlotte transformed her upstairs hallway from a dark and dated area to a bright, airy and modern space. Charlotte even went one step further and created a built-in bookcase, this is such a clever way to utilise space and create that ever important storage. We just want to sink into a chair with a good book and sit in this beautiful hallway all day. Charlotte describes her style as a ‘monochrome, classic, contemporary twist’ whilst loving neutral tones and classic features within her home, Charlotte states that she ‘despises clutter’ therefore an element of minimalism also comes into play with her style.
We had to find out what Charlotte’s inspiration was behind her DIY project and how she managed to execute it so well, here’s what you need to know:
“One of the main reasons I wanted to build our DIY shelving in the hallway was to have an open place to showcase our personal items in a stylish way, and for it to not only be functional space, but also form an interesting display of what makes us, us! As this is also our office/ working space I wanted to keep the decor minimal to maintain a decluttered mind, and also fill it with things that keep me motivated, such as quotes and prints that mean a lot.”
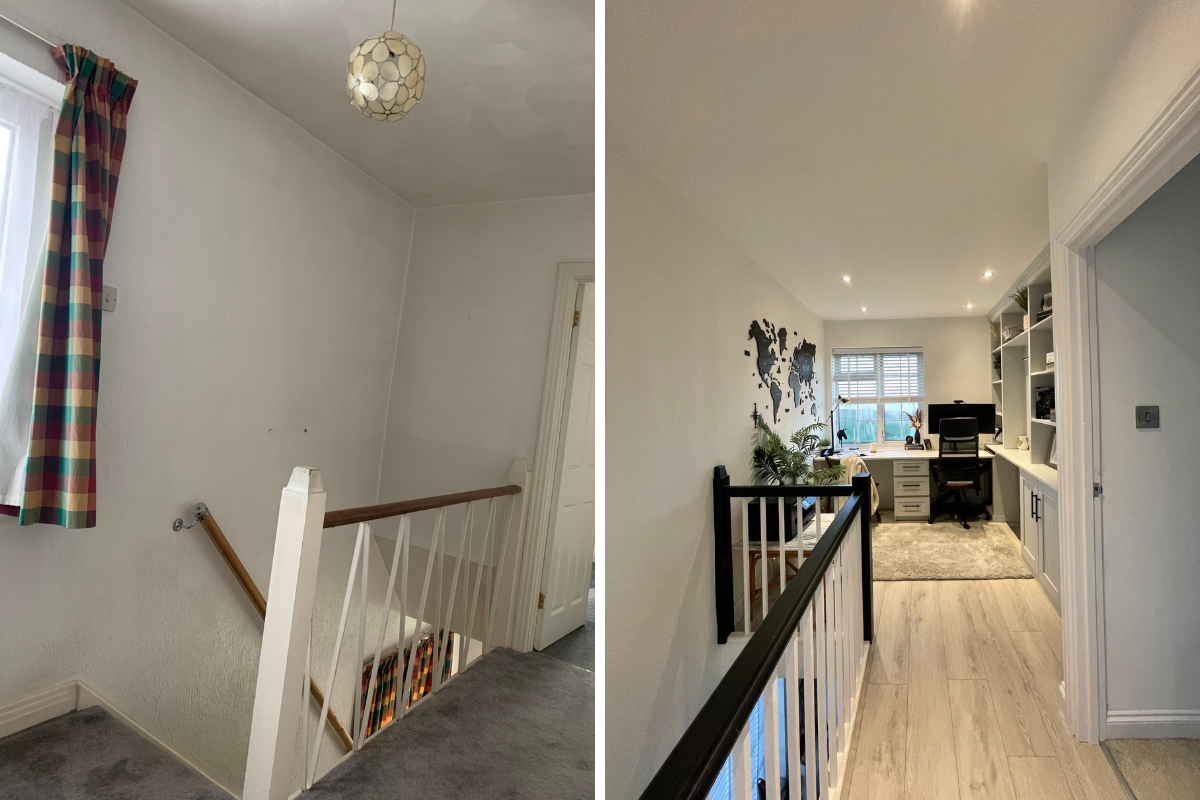
Using what would have been wasted space as a home office is a genius way to make the most of a floorplan. With a rise in home-working since the pandemic this DIY hack may just be what you needed to know to finally incorporate an office space in your home! Charlotte explains how this added feature is her favourite part of the design:
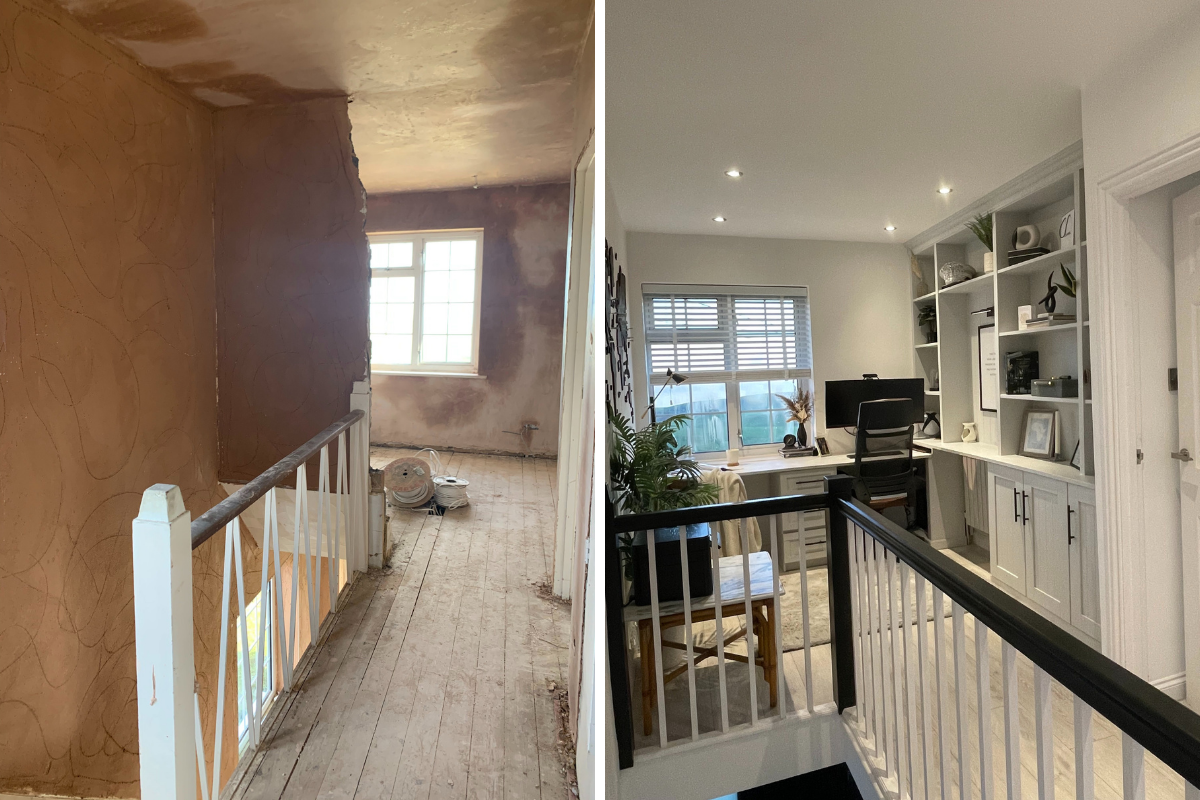
“I would say our open plan hallway/study area is up there with one of the best decisions we have made in our home renovation. When we first bought the house we felt like the ‘box bedroom’ at the end of the hallway was a wasted use of space and light, as we didn’t need the additional single bed and felt it made the 1st floor feel cramped and dark. So we decided to knock the wall down to form an open plan hallway / study space that was more useful to us and created a better flow through the house. We are south facing so this demolished wall flooded our hallway with natural light, and a once locked away wasted view of the South Downs, is now a picturesque sight every time you walk up stairs!”
We asked Charlotte if she has any budget friendly tips for others who are looking to transform their hallway or any another room in their house, here’s what she said:
“I find one of the biggest money burners when it comes to DIY is wastage through trial and error. By planning your cuts carefully, and purchasing materials in the most efficient sizes you will minimise the amount of unusable wasted material and save money on the way. As they say – Look after the pennies and the pounds look after themselves!”
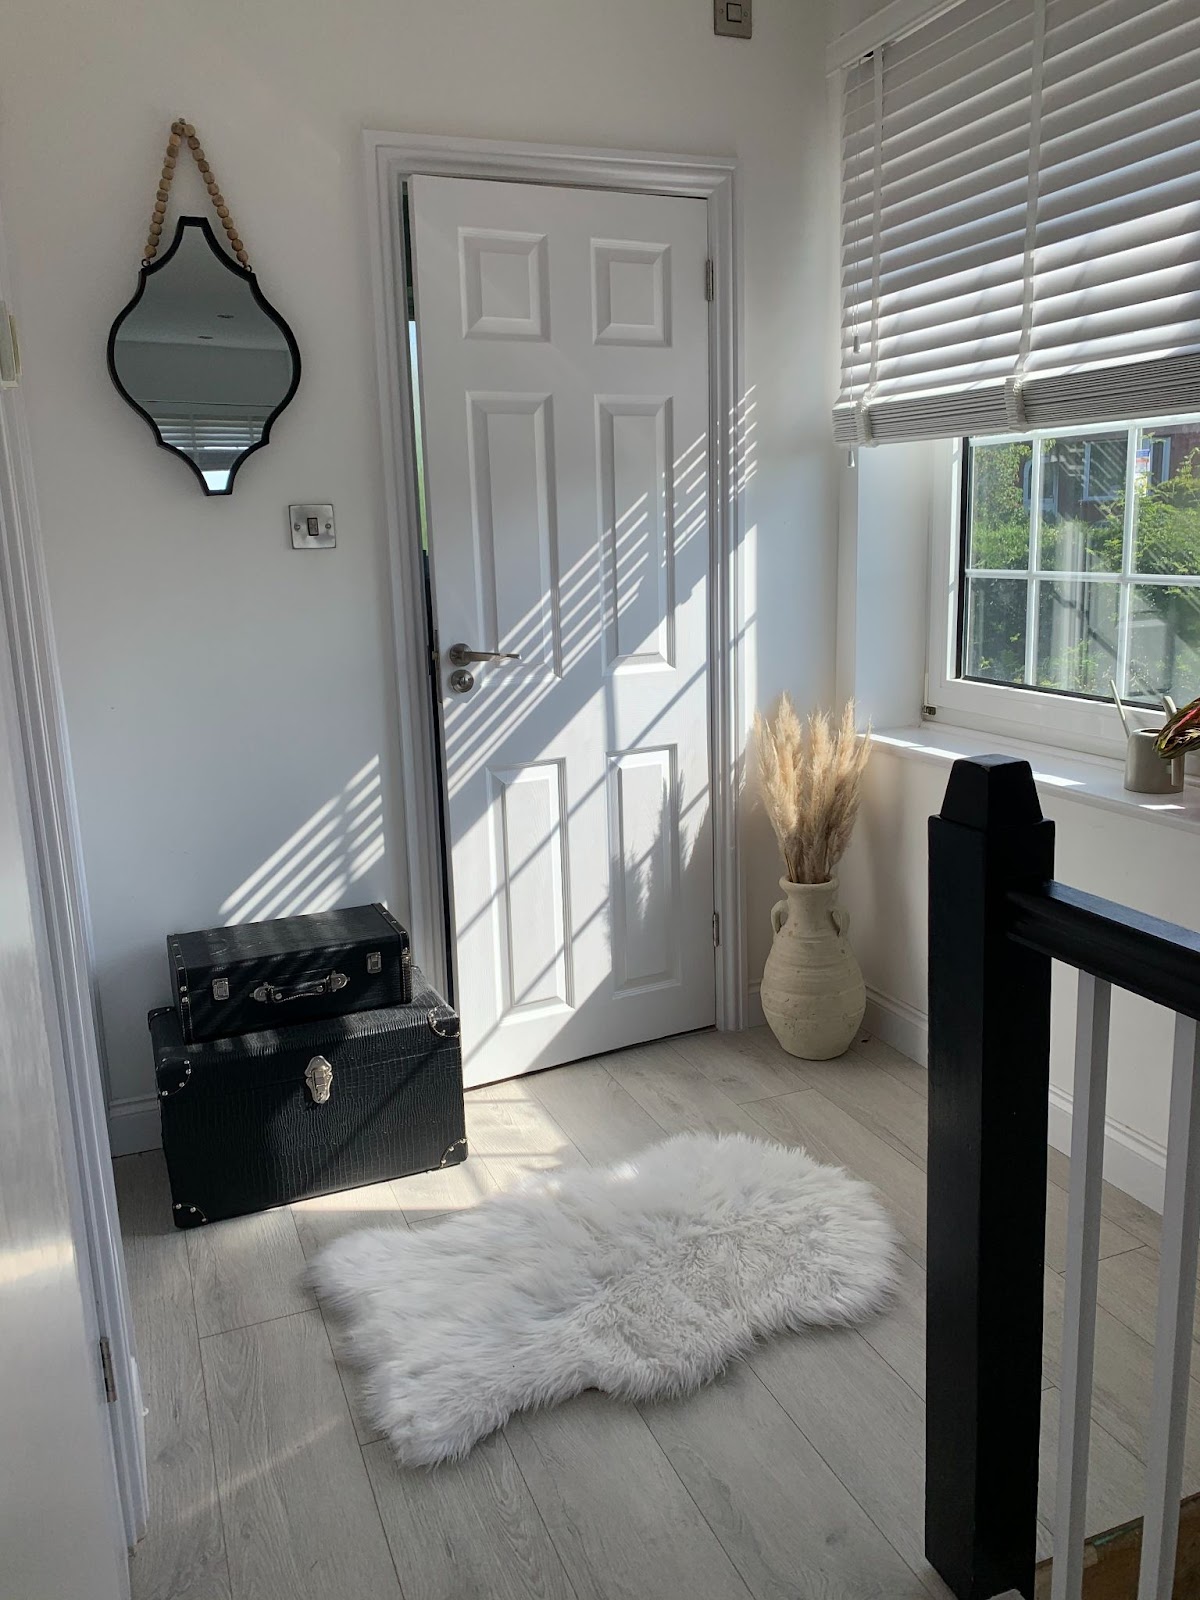
We love the juxtaposition of the bold monochrome staircase and accessories paired back with a sheepskin rug to add a much needed softness to the space.
We also asked Charlotte what her top tips are when it comes to DIY for beginners:
“Whatever the project, make sure you have a plan! It does not need to be set in stone but do not dive in until you can visualise what you’re trying to achieve. In my house every DIY starts with a cup of tea (or 5), a mood board that gives me a general idea of style, accurate measurements (I measure 3 times to be sure), a rough drawing of what the end goal looks like, and a materials/ tools list. I have learnt the hard way that failing to prepare is preparing to fail!”
